Showing posts with label Tutorials. Show all posts

DIY Pillow Sham Tutorial

I just recently made two pillow shams for Claire's new bedroom, and about halfway through it occurred to me that others could probably use these instructions to make some of their own.  So I quickly started snapping a few pictures along the way with my cell phone (sorry!)
~
 If you don't normally sew a whole lot, don't be intimidated...
if you can cut and sew a straight line, you can make these!
I made these using an envelope back, so each pillow sham is comprised of three pieces :
Front : 29 inches x 22 inches
Back : 20 inches x 22 inches (2)

After pieces are cut, you will need to hem one side of each back piece,
which is where the envelope will be.
On one piece, begin with the left side, fold it over apx 1/2 inch and iron, and then fold it again and iron.  Stitch the length of the hem to hold it.
 Repeat with the second back piece, this time hemming the right side.
 Lay your front piece down, right side facing up.  Then, lay your two back pieces down over it, right sides facing down.  The two back pieces will overlap several inches, creating your envelope.  Pin the pieces, right sides together.
 Sew around your entire rectangle, using about a 1/2 inch allowance.
(Be sure your envelope pieces are pinned well so they don't fold over as you sew!)
 Trim the corners, then turn your pillow right side out.
Push out the corners.
 Iron all of your edges so they are nice and flat.
You can re-pin the edges so they hold together well.
 Stitch the perimeter again, this time using an approximately 2 inch seam allowance.
~
That's it!
Go ahead and insert a standard size pillow, and you are done!
This is such a quick and easy way to spruce up a bedroom, let me know if you have any questions!


Photobucket

Interested in learning about essential oils?
 
I posted a bit about how my family got started with them here.
for more practical tips + information.

Clipboard Wall

I've been using my craft room for nearly two years now, and have several ideas of ways I would still like to decorate it, but for whatever reason, deciding what to do with this large wall over my counter has always plagued me.  I've toyed with the idea of art, but I already have my two pieces over the ledge (to the right) that I like.  And I also entertained the idea of a bulletin board, but those tend to get messy, and since I manage to make enough of a mess while creating in my craft room, I really didn't need a bulletin board contributing to that!
I've had this picture from The Pleated Poppy pinned for some time...
I love those little clipboards in the corner, and finally just decided to go for it and create my own clipboard wall.
I got to measuring the wall and knew that I wanted the clipboards to fill the entire space, so the best number turned out to be 8 clipboards, in two rows of 4.
~
I purchased the clipboards at Office Max for $1.99 each!!  And I also purchased a set of white mug hooks that only cost a few dollars for way more hooks than I needed.
I used the smallest drill bit I had and drilled small pilot holes,
then I added the hooks and this project was complete!
I love that these clipboards allow me to change up my lists and decor as much as I like.  There are so many cool free printables available now, I'm sure I'll be switching it up on a regular basis.  Here it was when I first installed it.
And now it looks like this!
~
I'm loving this so much, I'm already eyeing other places in our house I could add a clipboard or two...the kid's playroom might be next!

Skip To My Lou


Photobucket

Tutorial : 3D Hearts Garland

With Valentine's just around the corner, it was time for me to get to work on some cute decor! I'm pretty sure I never decorated for holidays like Valentines before Claire was born, but something about having a little girl in the house makes it so much more enjoyable.
~
This tutorial shows you how to make a
paper garland of 3D hearts!

1. Begin by selecting your paperfor this one, I'm only using two, double-sided papers. You could use as many or as few as you like depending on the look you're going for

2. Create a heart template from paper. I just grabbed a small piece of scrap paper I had, folded it in half and cut out a heart. The heart template doesn't have to be perfect, but you will want all of your hearts to be the same. My heart is about 1.5 inches tall, yours can be any size.

3. Beginning at one side of your paper, fold a crease down your paper, just big enough to trace your heart. Trace heart after heart the entire length of the paper.
4. Cut your hearts out and repeat through your entire sheet of paper
5. Repeat for any other papers you are using until all your hearts are cut out
6. Now to assemble the garland! Stack two hearts on top of each other, and begin stitching along the crease. A little tip : be sure to pull some extra thread through your needle before you begin so you have some on the end for hanging!

7. Continue to feed your hearts through your machine until your garland is as long as you need. I left just about a centimeter between each set of hearts, you can increase or decrease the spacing depending on what you prefer!

8. Once you're done stitching your hearts, pull each of the "sides" apart to create the 3D look, and you're ready to hang your garland!These look great draped, or hanging vertical.
~
There's just so many options for how you can make these. I kept mine pretty basic, but they could easily be glammed up with glitter and such. Or, let your kids make hearts of their own and string them together for them!
~
happy heart decorating!


Brownies in a Jar

For Christmas for my MOPS girls this year, I made Christmas Brownie Jars. Each jar is filled with the dry ingredients necessary to make brownies and includes the instructions for finishing the recipe.I find the smooth-sided jars at Hobby Lobby.
When on sale, they can be picked up for about $1.50 each.
~
To assemble, pour the following ingredients into the jar,
in this order:
(each ingredient may need to be pressed down to make sure there's enough room)

2 1/4 cups white sugar
2/3 cup unsweetened cocoa powder
1/2 cup chopped pecans
1 1/4 cups all-purpose flour
1 teaspoon baking powder
1 teaspoon salt

I printed the instructions on to large mailing labels and then cut them down to the size I needed. The instructions are as follows:

Pour all dry ingredients into a bowl. Mix thoroughly. Add 3/4 cup margarine or butter and 4 slightly beaten eggs. Mix until blended. Spread batter into slightly greased 9x13 pan. Bake at 350 degrees for 30 minutes. Cool completely prior to cutting.
~
These are great as hostess gifts, gifts for neighbors or secret Santa gifts.

Helpful hint : make a couple extra jars to have on hand for when you need a gift in a hurry!

Join  us Saturdays at tatertotsandjello.com for the weekend wrap up     party!

Small Gifts : Snowman Soup

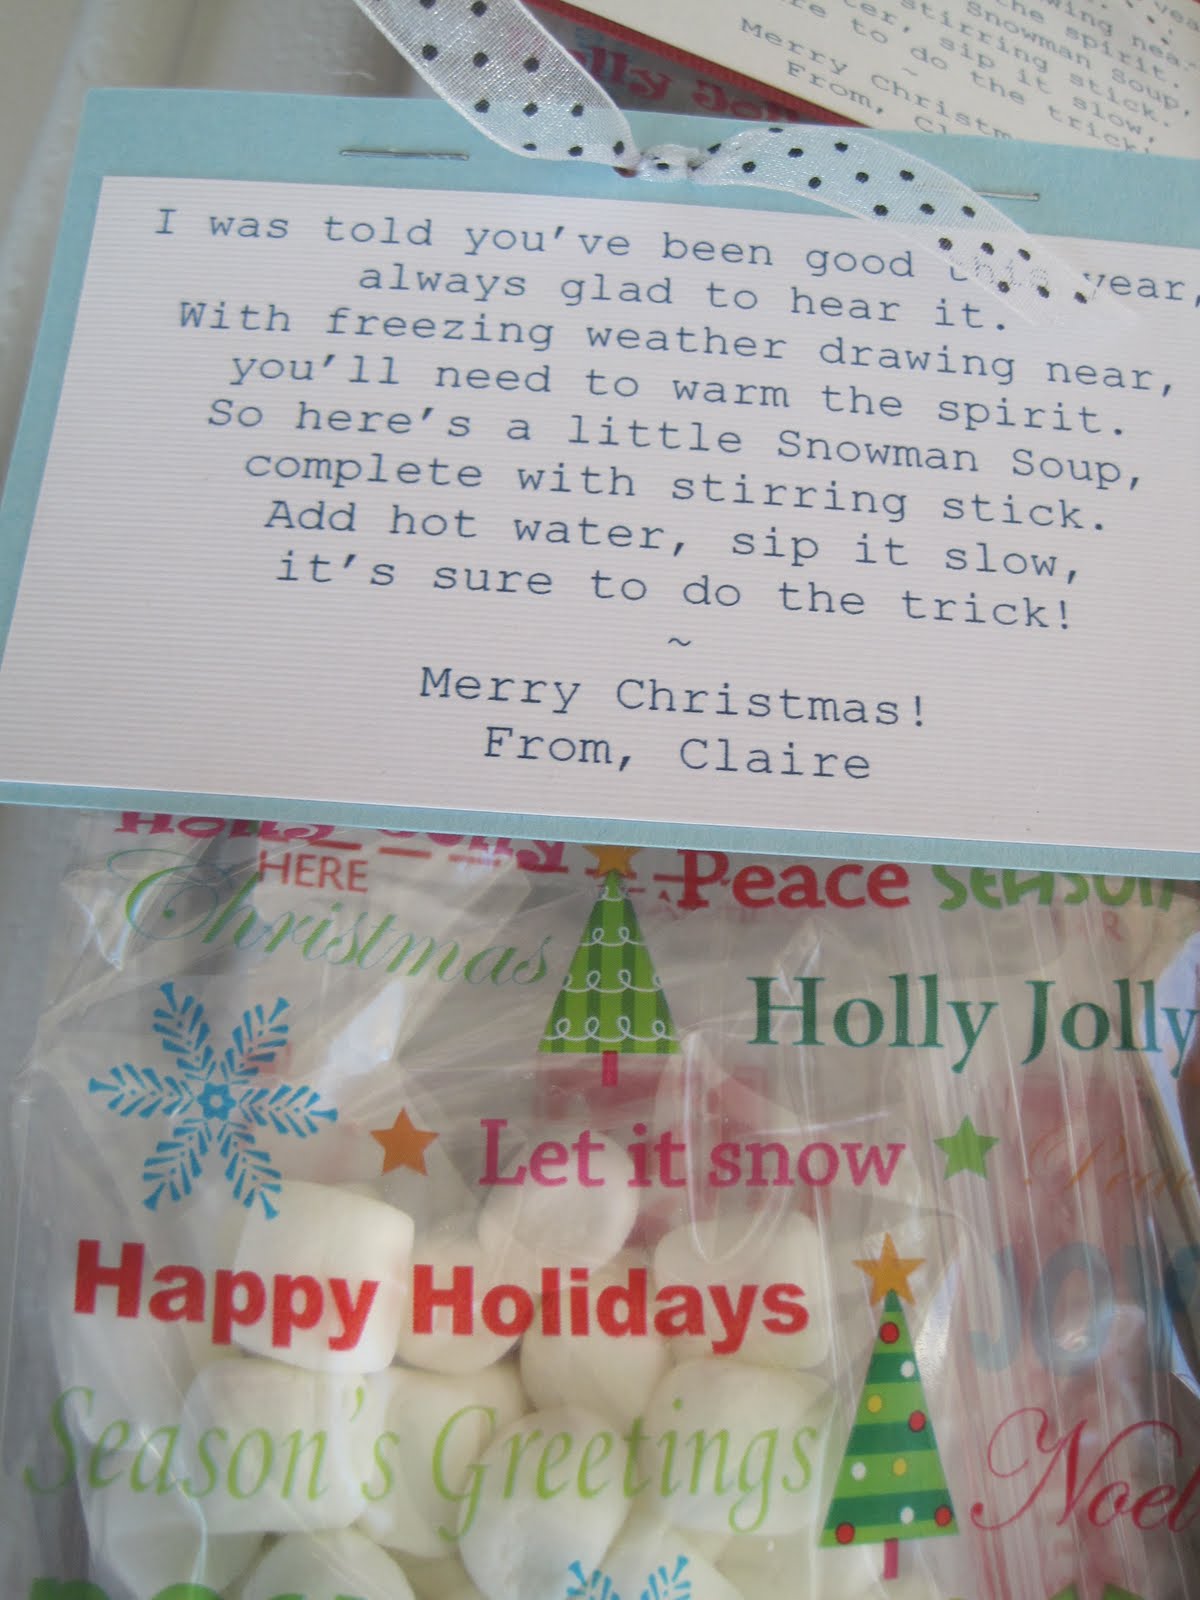
I wanted to come up with a small gift that Claire could give her classmates and friends for Christmas. We decided on small bags with all the ingredients necessary for Snowman Soup!
~
Here's what you'll need :
hot cocoa packets
small marshmallows plus snack-size zip lock bags
small candy canes
small favor bags
card stock
ribboneach bag includes one packet of hot cocoa mix, one small zip lock of marshmallows and one candy cane. It was simple enough that Claire could help with the assembly.
I had big plans of making small snowman labels for the bags using my Cricut, but both my time and energy ran out (plus I remembered that these are for three year olds who probably don't really care what the package looks like!) So instead I just printed out the Snowman Soup poem on card stock :

I was told you've been good this year,
always glad to hear it.
With freezing weather drawing near,
you'll need to warm the spirit.
So here's a little Snowman Soup,
complete with stirring stick.
Add hot water, sip it slow,
it's sure to do the trick!Place each of the ingredients in the favor bag and finish it off with your tag showing the poem
I was able to make 20 gifts for less than $15!!But we only have 19 to give away as Claire required sampling one!


HollyBloggyButton1

Pinwheels : Revisted

***Originally posted July, 2009***
~
For today's getting patriotic project, I made red, white and blue pinwheels! What a fun (and SUPER easy) project this was. I'm totally going to remember pinwheels for future parties, either as part of the favors I give out, or as center pieces. (Wow, did I really just say I'm totally...???")
~
Anyway. The tutorial for making the pinwheels can be found here.
~
For my pinwheels I:

*found some great two-sided paper at my extremely large and well-stocked but slightly overpriced scrapbook store nearby. The blue and white polka dot paper is my favorite (what's with me and polka dots lately?!?)

*cut my squares to 6 inches x 6 inches and used scrapbooking scissors to give the edges a little pizazz.

*used American flag pencils rather than dowels as the directions suggested. (These pencils along with all sorts of other red, white and blue goodies are currently in the dollar bins at Target, get yours fast!)

*used some of my red, white and blue sewing pins as opposed to the tacks shown in the tutorial. The pins stuck out the opposite side of the pencil eraser, so I just used a wire cutters to cut them off.

Cute!